If you use NomadBSD like me and us here in this forum and got tired of slow I/O speeds on your USB flash drives with them and suffer from apps or the entire desktop hanging or crashing
or
if you are a brand new user to the NomadBSD project and plan to use NomadBSD without to suffer from the aformentioned problems,
here’s a simple trick how to throw away all your regular USB pen drives and (from the start) make your NomadBSD desktop experience great (again) ![]() :
:
What you will need to have/organize:
- A (micro)SD card from a major brand (e.g.: Western Digital(R), SanDisk(R), Samsung(R) etc.)
- an accompanied microSD to SD card adapter (only mandatory if you are using a microSD card)
- A USB to SDHC/XC adapter from a major brand (e.g.: hama(R))
- A computer to perform the burning/installation steps onto
- A little brain capacity and enough attention to the detail

As with USB flash drives, it is highly recommended you do not buy cheap no-name branded SD card and/or USB-to-SDHC/XC adapter, as those tend to break much faster from time to time.
What you will need to do:
1.) Downloading the NomadBSD image
First things first, download an actual copy of the official NomadBSD image for your architechture and OS from the Downloads Section of the NomadBSD homepage:
Take in mind, that only i386/x86/32-bit, amd64/x86_64/64-bit and Apple Mac x86_64 are the only supported installation targets.
2.) 1. Highly Optional But Very Recommended Step - Building a checksum of the downloaded image and compare it with the accompanied checksum files:
After you downloaded the image, for your computer security, you may want to verify its integrity to make sure nobody else has fooled with it. That doesn’t take much time and leaves you in certainity that your installation image is hopefully not corrupted in any form. We take a 2-step-verification approach to be really assured that our downloaded image is safe to be committed to install on a (micro)SD card.
It may also be handy if you keep the compressed and the uncompressed image handy for later, as we will need them for the upcoming steps. If you did not uncompress your image, now it’s a good time to do so.
Also, next to your mirrors from where you have downloaded the image, download both SHA-256 raw checksum text files and keep them handy for later.
Now it’s time to verify the zipped image files, to cursory check if the image file has been tampered with something else; for that, go open a terminal window as a normal user and type:
user@pc ~ %> sha256 nomadbsd-x.y.z.img.lzma
If you’re happened to be on GNU/Linux or even on Microsoft(R) Windows(R) or happened to be using the Microsoft(R) PowerShell, you’ll have to enter the following command into your terminal instead:
user@pc ~ %> sha256sum nomadbsd-x.y.z.img.lzma
After you’ve built the checksums for zipped images, you should see the output of the built checksum using the SHA-256 algorithm in the terminal. Open your downloaded checksum file for the zipped image you have downloaded earlier and compare the contents of the file with the displayed output in the terminal.
Now, if both displayed strings happen to be not identical, DO NOT USE THIS IMAGE FOR FURTHER PROCEDURES AND DELETE IT AT ONCE, otherwise we continue verifying the image as follows:
After unpacking the image as described in (1) NomadBSD - Download , it’s time to verify the raw installation image by typing
user@pc ~ %> sha256 nomadbsd-x.y.z.img
or - for our fellow GNU/Linux and Windows(R) users - by typing
user@pc ~ %> sha256sum nomadbsd-x.y.z.img
into the terminal and compare the contents of the terminal output with the contents of the raw image checksum file this time.
Again, as a little reminder: If both displayed strings happen to be not identical, DO NOT USE THIS IMAGE FOR FURTHER PROCEDURES AND DELETE IT AT ONCE.
Having done the verification steps it’s finally time to move to the fun part; the installation of NomadBSD onto your (micro)SD card.
- The dum(b/p) Flashing Part
Now, this is it, by now you’ve made it so far, you may now commit your changes to disk, uhh I mean your (micro)SD card. As the (1) NomadBSD Download Page (NomadBSD - Download) suggests you will definitely need to burn (or “dump”) the image onto your card with dd(1). To speed up the process, we will use the compressed image and flash it with xzcat(1) and dd(1). At this point, you may delete the uncompressed raw image now, too, as we will not need it anymore and it by now takes up too much SSD/hard drive space.
To correctly burn an image using dd(1) and xzcat(1) in NomadBSD and/or FreeBSD type the following command in the terminal, as suggested in (1) NomadBSD - Download :
user@pc ~ %> xzcat nomadbsd-x.y.z.img.lzma | dd of=/dev/daX bs=1m status=progress
If you’re happened to be on a system utilizing DragonFlyBSD or even GNU/Linux then simply replace of=/dev/daX with of=/dev/sdX in the above command where X is your device unit number. On GNU/Linux especially, you will have to replace the dd(1) parameter bs=1m to bs=1M.
On OpenBSD and NetBSD, you may replace of=/dev/daX with of=/dev/rsdXc or of=/dev/rsdXd, respectively, instead.
On Apple(R) macOS(R), you have to replace the above of=/dev/daX with of=/dev/rdiskX.
On Microsoft(R) Windows(R)… sorry, you are out of luck ![]() . Nah, just kidding. The (1) NomadBSD Download Section (NomadBSD - Download) also has instructions to guiding you how to properly flash the image on a microSD card on a machine running Windows(R). It boils down to download a third-party application like balenaEtcher (etcher.io) or Rufus (https://rufus.ie) to burn the image with one of those tools.
. Nah, just kidding. The (1) NomadBSD Download Section (NomadBSD - Download) also has instructions to guiding you how to properly flash the image on a microSD card on a machine running Windows(R). It boils down to download a third-party application like balenaEtcher (etcher.io) or Rufus (https://rufus.ie) to burn the image with one of those tools.
[Side note: If you ask me which tool to use, I’d suggest you use balenaEtcher first and if it does not burn the image correctly, use Rufus, but ultimately, I don’t care. That’s your choice.]
If you are unsure on which platform you are or which architechture you are using, type in the terminal:
user@pc ~ %> uname -a
and let your computer tell it to you.
Now that the image is burnt onto our (micro)SD card, it is time to get into the meats and potatoes, uhh, I mean for the next step.
3.) Reboot your computer and get into the (UEFI) BIOS menu
Now that we have written NomadBSD to the SD card we have come to the tricky part: We need to change the subdevice and operating system boot order in order to boot up NomadBSD for the first time. For this we need to restart the PC and repeatedly hit the key to get into the (UEFI) BIOS of your PC. Consult your PC manufacturer’s computer manual to find out the right key.
Usually, it is one of the function keys (F1 to F12), the Escape key (ESC), the Delete key (DEL) or sometimes even the Backspace key ( ← ) or even the Insert/Print key (INS) / (PRINT). As you may have noticed, all (UEFI) BIOS’s are not identical to each other so you are on your own having to find out for yourself the submenu with the options to change the boot order and how to change it.
Thankfully, modern PC’s ship with an UEFI BIOS, an enhanced edition of the classical BIOS, which contain a more fancy menu UI with a detailed description of every menu option so this part shall not be too difficult to master.
In the (UEFI) BIOS, under your boot order settings, set to boot your computer from the USB flash drives at first, then your hard drive at second.
After this is done, it is time to reboot again!
4.) Boot into your newly flashed microSD card with NomadBSD image on it!
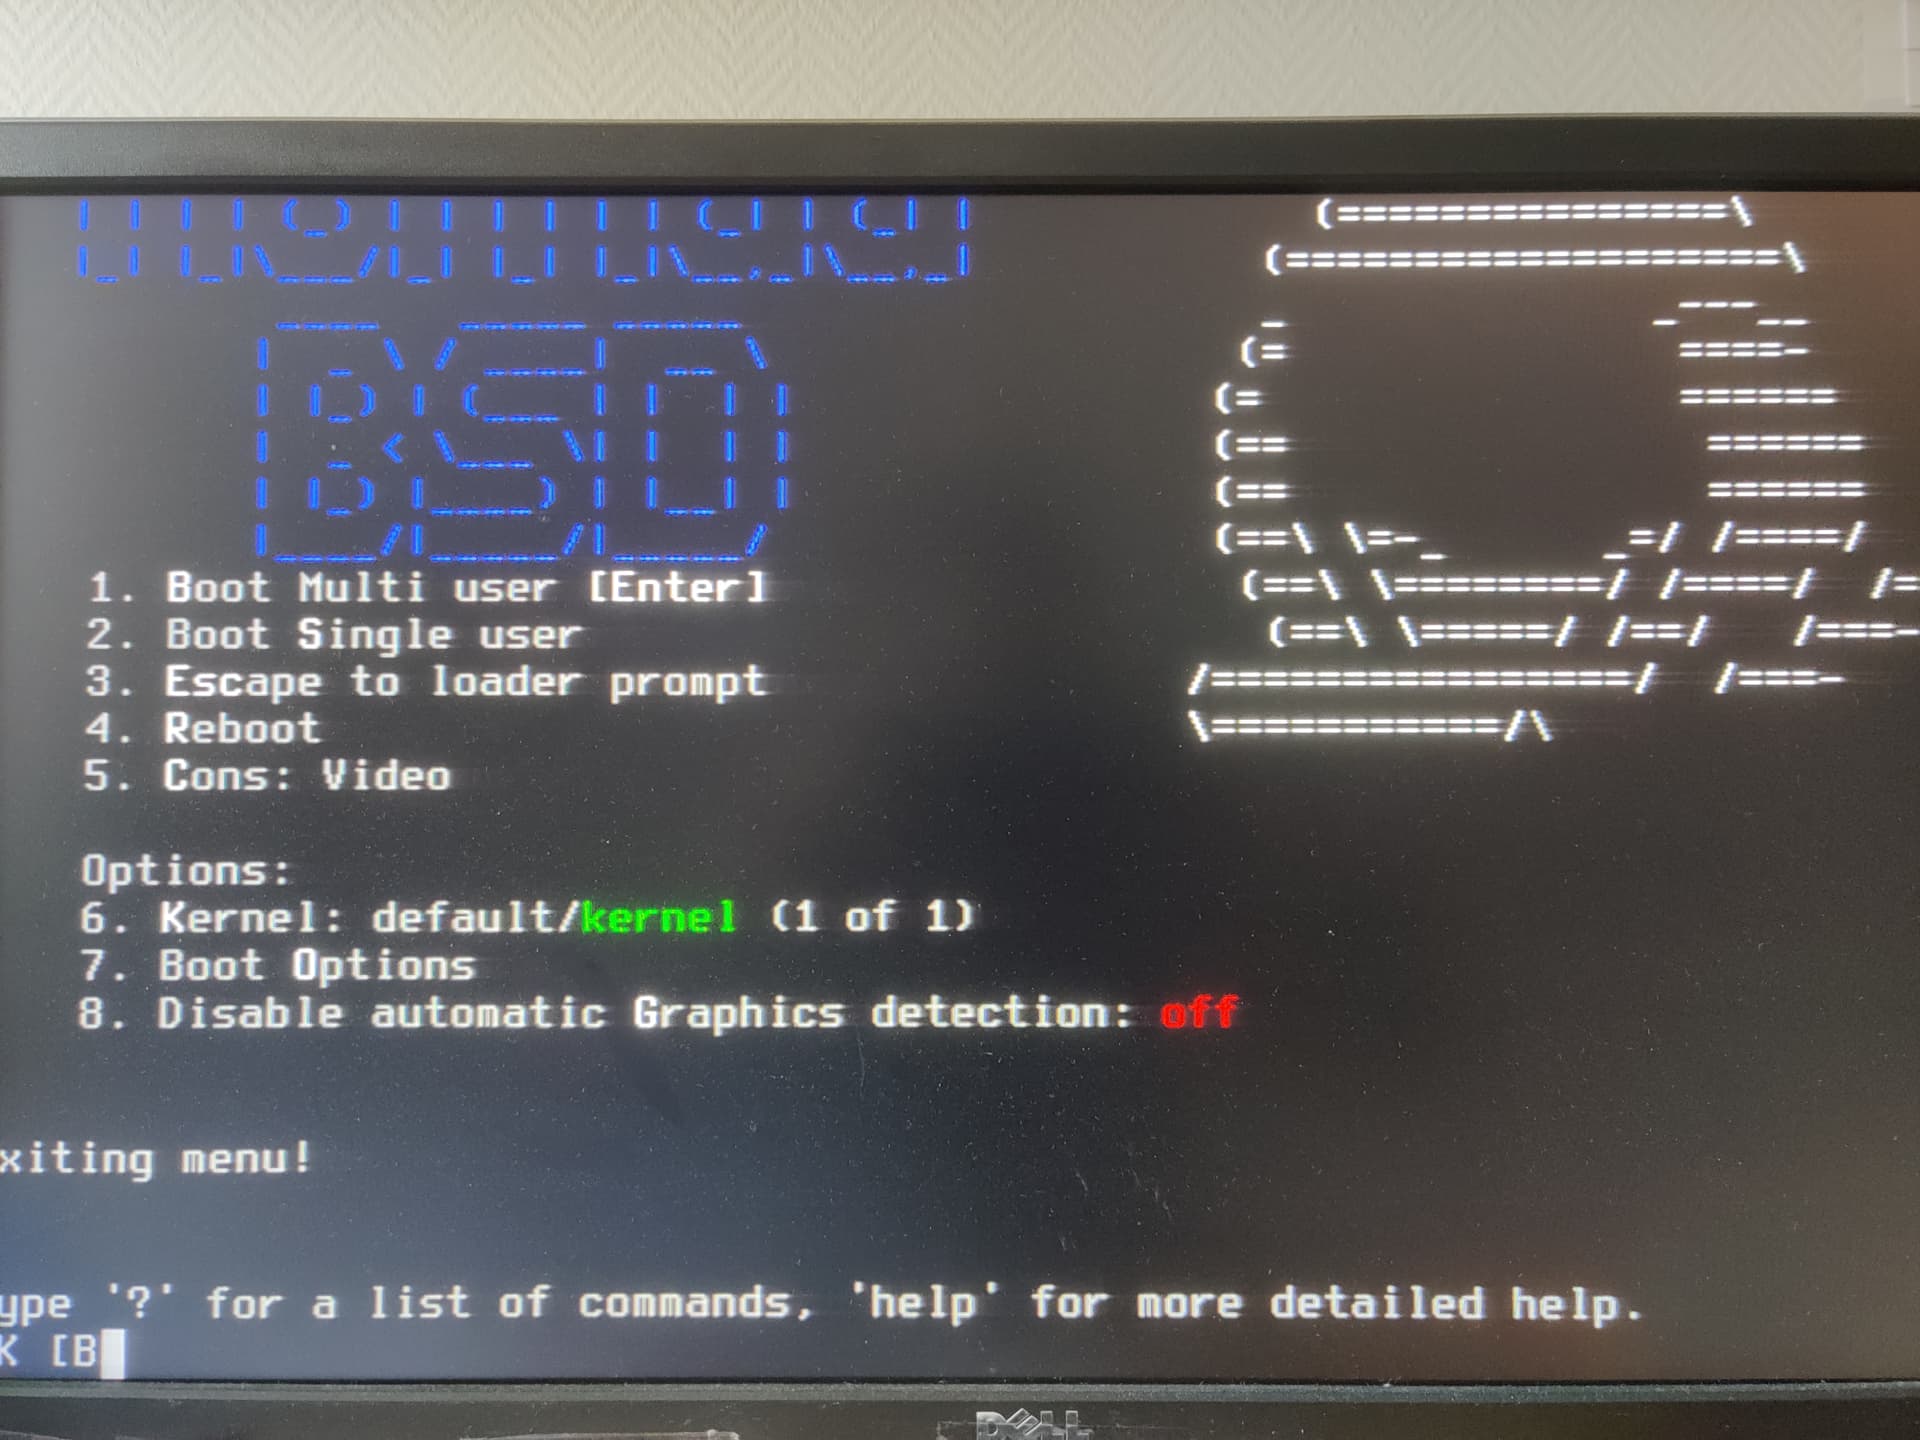
Once your computer boots up, you should get a boot screen menu like this one here:
https://forum.nomadbsd.org/uploads/default/original/1X/deaf18755f44823cf849d246382aefe435c66c80.jpeg
without the nonsense stuff on the below half of the screen, just the menu with the NomadBSD logo and its 8 menu options/items.
Either wait 10 seconds to let your computer boot NomadBSD itself or, if you are too impatient for it to load up - just like me sometimes ![]() -, you may press Enter/Return (<–|) or the key 1 on your keyboard/numpad.
-, you may press Enter/Return (<–|) or the key 1 on your keyboard/numpad.
Don’t be afraid if you see much gibberish printed on your screen, that’s perfectly normal and a sign NomadBSD boots up correctly, detecting devices on your computer etc. . After a little while you should be greeted with the NomadBSD installer which leads us to…
5.) Install NomadBSD persistently on your (micro)SD card
Now that you have successfully booted into the USB flash drive with the NomadBSD image on it and you are now greeted by the NomadBSD USB installer we are finally so close, we just need to take the last installation steps before you may officially call this USB drive a NomadBSD-powered USB flash drive and call it a day.
This is probably the easiest part of the NomadBSD installation, just follow along the graphical NomadBSD USB flash drive installer and set your
- language
- keyboard layout
- time zone
- favorite shell
- favorite text editor
and then hit the “Install” button on the bottom right corner. The NomadBSD installer takes care of anything related to from partioning your USB flash drive to installing your desktop, web browser, e-mail client etc.*
After this is done, the NomadBSD USB flash drive installer prompts the installation has finished and you need to reboot your computer a second time after which you may officially use and enjoy NomadBSD! Just hit the “Reboot” button in the bottom right corner of the installer wizard window and let your computer reboot.
A friendly reminder: Do not touch your attached (micro)SD card/USB adapter at reboot.
While rebooting you will need to take the same steps as described in 4.) but you will boot directly into your new NomadBSD desktop!
At this point, you have made it! Congratulations! No matter if you are brand new to NomadBSD (and FreeBSD in general) or if you are a lazy FreeBSD veteran who just seeked for a super-friendly tutorial on how to flash NomadBSD to an SD card, which by the way is an open secret in this forum on how to do this, you really should have earned a prize for that! Well done!
You can now use NomadBSD in its full glory! Do whatever you wish to do with it!
If there are any questions regarding how to use NomadBSD on a daily basis or if something goes wrong with your new system, consult (2) NomadBSD - Handbooklet for more information. Additionally, if you are stuck and you do not find an answer to your problem, remember, NomadBSD is just a slightly adapted FreeBSD, so please consult (3) FreeBSD Handbook | FreeBSD Documentation Portal for even more information. Now if those two resources did not give you the solution you are looking for, you can ask in this forum - https://forum.nomadbsd.org/ - for help and rest assured that there are people willingful to help you in your endeavor.
In the name of all members of the NomadBSD forum I wish you
Happy BSDing!
YD | yodar101


